
基于测试dpos共识的性能,本文讲解如何在私链上测试BitShares每秒的交易量。
1. 测试基础准备
-
部署BitShares私链。关于如何部署BitShares私链请参看:BitShares 2.0 多节点私链部署
-
创建命令行钱包(
cli_wallet)。关于如何创建钱包请参考:创建钱包 -
交易量的压力测试是基于命令行钱包的
Wallet API进行转账,所以需要开启rpc监听和导入用户私钥。关于如何使用钱包请参考:命令行钱包的使用
2. 安装 Graphene 的 python 库
下载Graphene的python库代码:
git clone https://github.com/xeroc/python-graphenelib/
安装python-graphenelib库:
cd python-graphenelib
python3 setup.py install --user
3. 编写交易测试脚本
假设当前私链的区块生产间隔是1s,cli_wallet命令行钱包的开启的rpc监听端口是8099,则通过每个区块从账户nathan给账户gamma转账1000次的测试脚本如下:
import time
import json
from grapheneapi.grapheneapi import GrapheneAPI

blockinterval    = 1
numbertxperblock = 1000

#log = open("stress_test.log","a");

if __name__ == '__main__':
    client = GrapheneAPI("localhost", 8099, "", "")
    while True :
        for i in range(0,numbertxperblock) :
#           print(i)
#           log.write(str(i))
            res = client.transfer("nathan","gamma","0.001", "BTS", "", True);
#           print(json.dumps(res,indent=4))
#           log.write(json.dumps(res,indent=4))
        time.sleep(blockinterval)
#log.close()

123456789101112131415161718192021
保存交易测试脚本,并将文件命名为stress_test.py。
4. 开始交易测试
- 开启BitShares私链证人节点
witness_node生产区块; - 将
cli_wallet命令行钱包连接到区块链,并开启rpc监听端口8099; - 使命令行钱包
cli_wallet处于解锁状态(命令:unlock 钱包密码); - 运行交易量压力测试脚本:
python stress_test.py
- 1
5. 测试结果
测试软件环境:
- 局域网络;
-
4证人节点; -
11个证人; - 出块间隔
1s; - 每秒发起
1000个交易;
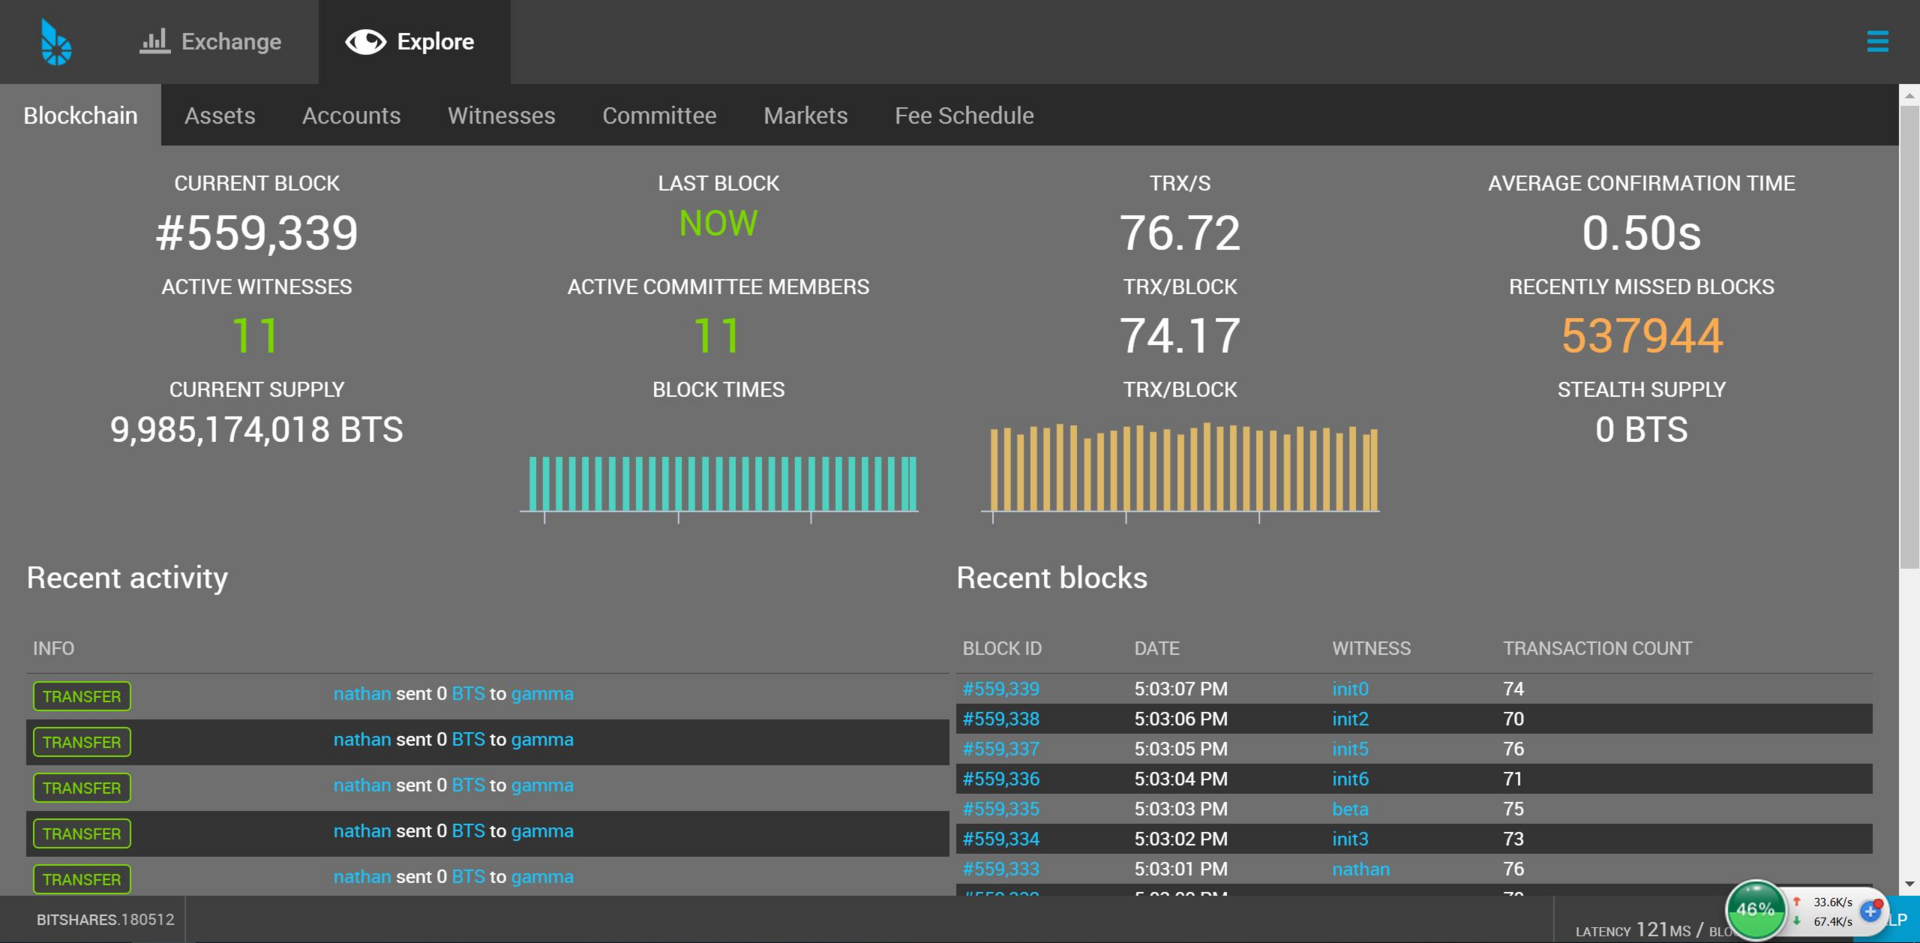
测试结果:平均每秒交易量80TPS左右,平均确认时间0.50s,详情如下图:
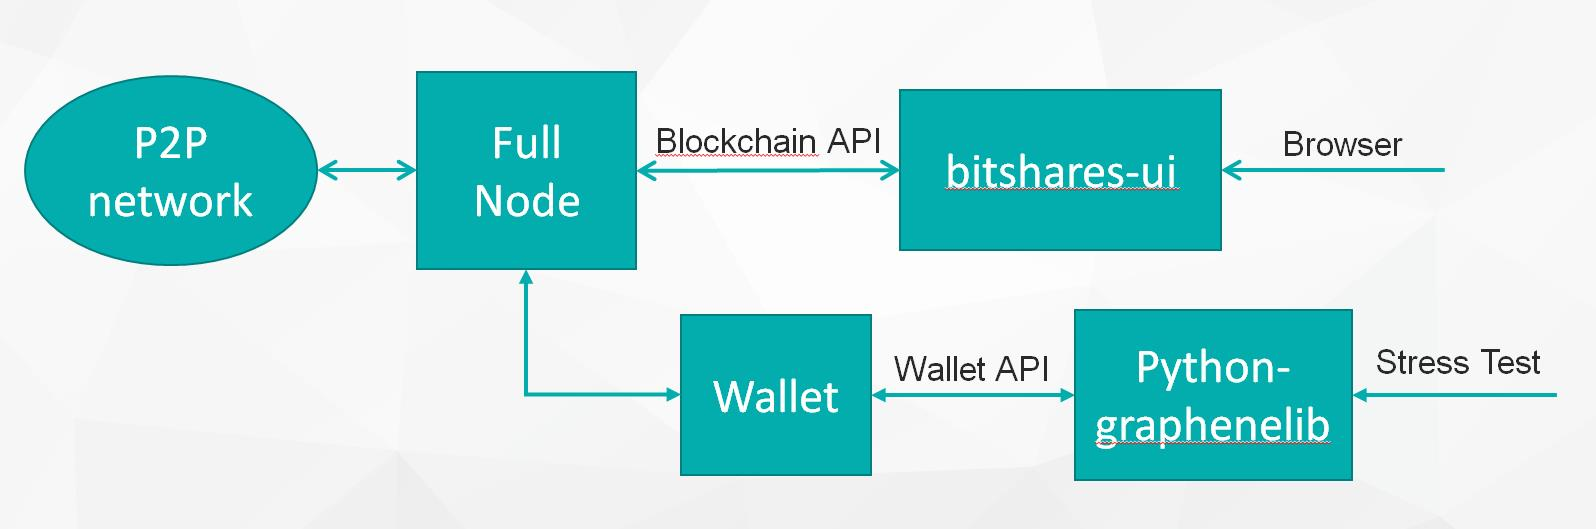
6. 节点模块间调用关系
最后来说说节点各个模块进程(全节点、命令行钱包、web钱包和压力测试进程)之间的调用关系:
参考文章
[Testnet-StressTest] March 15th - 3:00pm UTC:https://bitsharestalk.org/index.php/topic,23829.0.html
[Python] Price Feed Script for BitShares 2.0:https://bitsharestalk.org/index.php?topic=18852.0
Python Library for Graphene:https://github.com/xeroc/python-graphenelib
Test Net for Advanced Users:https://bitsharestalk.org/index.php?topic=17962.1110